Overview of wxPython
What is wxPython?
wxPython is a cross-platform GUI toolkit for the Python programming language. It allows Python programmers to create programs with a robust, highly functional graphical user interface, simply and easily. It is implemented as a set of Python extension modules that wrap the GUI components of the popular wxWidgets cross platform library, which is written in C++.
Like Python and wxWidgets, wxPython is Open Source, which means that it is free for anyone to use and the source code is available for anyone to look at and modify. And anyone can contribute fixes or enhancements to the project.
wxPython is a cross-platform toolkit. This means that the same program will run on multiple platforms without modification. Currently Supported platforms are Microsoft Windows, Mac OS X and macOS, and Linux or other unix-like systems with GTK2 or GTK3 libraries. In most cases the native widgets are used on each platform to provide a 100% native look and feel for the application.
Since the programming language is Python, wxPython programs are simple, easy to write and easy to understand.
What is wxPython Phoenix?
wxPython's Project Phoenix is a new from-the-ground-up implementation of wxPython, created with the intent of making wxPython "better, stronger, faster than he was before." In other words, this new implementation is focused on improving speed, maintainability and extensibility of wxPython, as well as removing most of the cruft that had accumulated over the long life of Classic wxPython.
The project has been in development off and on, mostly behind the scenes, for many years. For the past few years automated snapshot builds have been available for those adventurous enough to try it, and many people eventually started using the snapshots in their projects, even for production releases. While there are still some things on the periphery that need to be completed, the core of the new wxPython extension modules which wrap the wxWidgets code has been stable for a long time now.
Due to some things being cleaned up, reorganized, simplified and dehackified wxPython Phoenix is not completely backwards compatible with wxPython Classic. This is intended, on purpose, by design. In general, however, the API differences tend to be minor and some applications can use Phoenix with slight, or even with no modifications. In some other cases the correct way to do things was also available in Classic and it's only the wrong way that has been removed from Phoenix. For more information there is a Migration Guide document available at: https://docs.wxpython.org/MigrationGuide.html.
The new wxPython API reference documentation, including all Python-specific additions and customizations, and also docs for the wx.lib package, is located at: https://docs.wxpython.org/.
Hello World
Every programming language and UI toolkit needs to have a Hello World example. I think it's the law in most jurisdictions. 🤔 Their intent is obviously to tell you everything you need to know in order to select the language or toolkit for your own use. So, here is wxPython's Hello World:
# First things, first. Import the wxPython package.
import wx

# Next, create an application object.
app = wx.App()

# Then a frame.
frm = wx.Frame(None, title="Hello World")

# Show it.
frm.Show()

# Start the event loop.
app.MainLoop()
Five lines of code to create and show a window, and run an event handler. That's really all it takes.
What, you think 5 lines is too many? Okay, fine. Here it is in one line 😛 :
import wx; a=wx.App(); wx.Frame(None, title="Hello World").Show(); a.MainLoop()
Hello World, Part 2
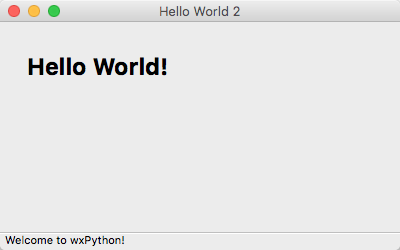
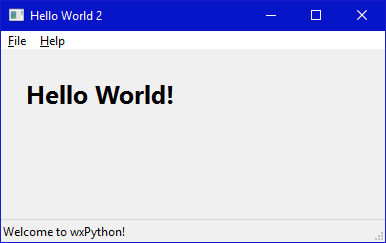
Okay, now let's put a little more flesh on the bones of that Hello World sample to give a little better idea of what creating a wxPython application is all about. The finished application looks like these screenshots when run:
And here is the source code. The docstrings and the comments in the code will help you understand what it is doing.
#!/bin/python
"""
Hello World, but with more meat.
"""

import wx

class HelloFrame(wx.Frame):
    """
    A Frame that says Hello World
    """

    def __init__(self, *args, **kw):
        # ensure the parent's __init__ is called
        super(HelloFrame, self).__init__(*args, **kw)

        # create a panel in the frame
        pnl = wx.Panel(self)

        # and put some text with a larger bold font on it
        st = wx.StaticText(pnl, label="Hello World!", pos=(25,25))
        font = st.GetFont()
        font.PointSize += 10
        font = font.Bold()
        st.SetFont(font)

        # create a menu bar
        self.makeMenuBar()

        # and a status bar
        self.CreateStatusBar()
        self.SetStatusText("Welcome to wxPython!")


    def makeMenuBar(self):
        """
        A menu bar is composed of menus, which are composed of menu items.
        This method builds a set of menus and binds handlers to be called
        when the menu item is selected.
        """

        # Make a file menu with Hello and Exit items
        fileMenu = wx.Menu()
        # The "\t..." syntax defines an accelerator key that also triggers
        # the same event
        helloItem = fileMenu.Append(-1, "&Hello...\tCtrl-H",
                "Help string shown in status bar for this menu item")
        fileMenu.AppendSeparator()
        # When using a stock ID we don't need to specify the menu item's
        # label
        exitItem = fileMenu.Append(wx.ID_EXIT)

        # Now a help menu for the about item
        helpMenu = wx.Menu()
        aboutItem = helpMenu.Append(wx.ID_ABOUT)

        # Make the menu bar and add the two menus to it. The '&' defines
        # that the next letter is the "mnemonic" for the menu item. On the
        # platforms that support it those letters are underlined and can be
        # triggered from the keyboard.
        menuBar = wx.MenuBar()
        menuBar.Append(fileMenu, "&File")
        menuBar.Append(helpMenu, "&Help")

        # Give the menu bar to the frame
        self.SetMenuBar(menuBar)

        # Finally, associate a handler function with the EVT_MENU event for
        # each of the menu items. That means that when that menu item is
        # activated then the associated handler function will be called.
        self.Bind(wx.EVT_MENU, self.OnHello, helloItem)
        self.Bind(wx.EVT_MENU, self.OnExit,  exitItem)
        self.Bind(wx.EVT_MENU, self.OnAbout, aboutItem)


    def OnExit(self, event):
        """Close the frame, terminating the application."""
        self.Close(True)


    def OnHello(self, event):
        """Say hello to the user."""
        wx.MessageBox("Hello again from wxPython")


    def OnAbout(self, event):
        """Display an About Dialog"""
        wx.MessageBox("This is a wxPython Hello World sample",
                      "About Hello World 2",
                      wx.OK|wx.ICON_INFORMATION)


if __name__ == '__main__':
    # When this module is run (not imported) then create the app, the
    # frame, show it, and start the event loop.
    app = wx.App()
    frm = HelloFrame(None, title='Hello World 2')
    frm.Show()
    app.MainLoop()